
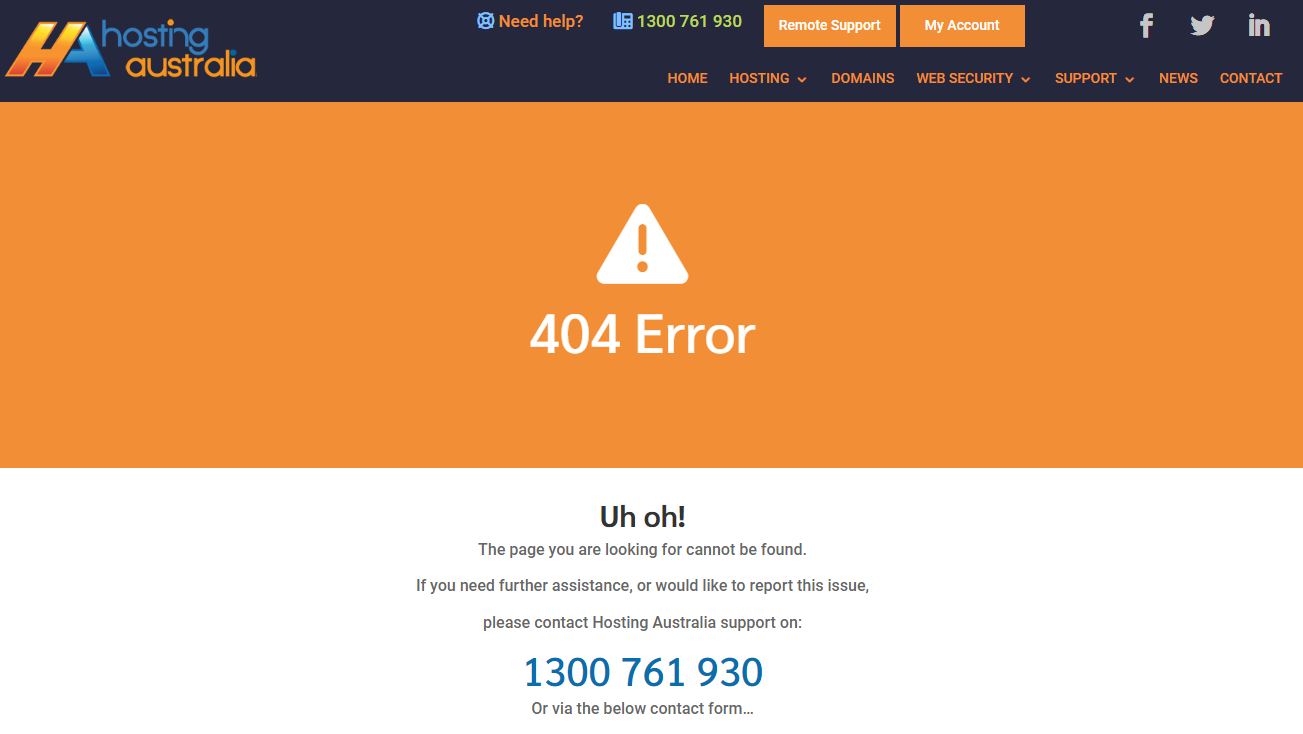
For many website visitors, a 404 error is the first (and last) impression of your website. Visitors will judge the site based on their experience with the broken link. If you’re putting serious effort into your website and its content, it’s not worth risking that someone will have a terrible time trying to find what they are looking for because of a simple 404 error.
The main thing you can do to improve your visitors' experience with 404 pages is to reduce the likelihood of them ever landing on a 404 page in the first place.
However, you should accept that you won't be able to prevent all instances of your visitors arriving at a 404 page on your website, so your secondary goal should be to ensure that when they do, the 404 page is well designed and useful.
To avoid negative user experiences, you need to create and verify user-friendly URLs on your site. Users should be able to find exactly what they’re looking for without difficulty, regardless of whether they use bookmarks or search function to revisit pages. Identifying and fixing 404 errors is one way of minimizing those frustrating redirection messages that users may see when visiting your site.
Let’s look at how you can improve your site by finding and removing 404 pages.
There are several tools available to assist website owners in quickly and easily identifying all broken links that are serving 404 errors on a website. Even better, many of them are free.
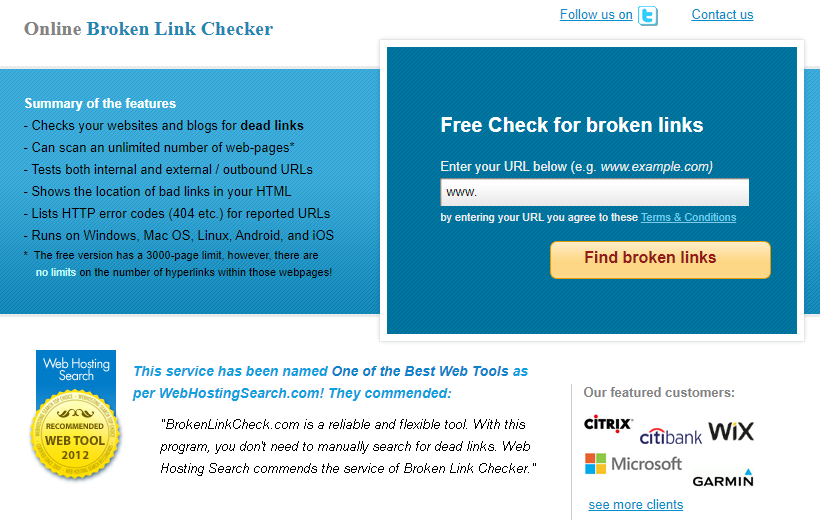
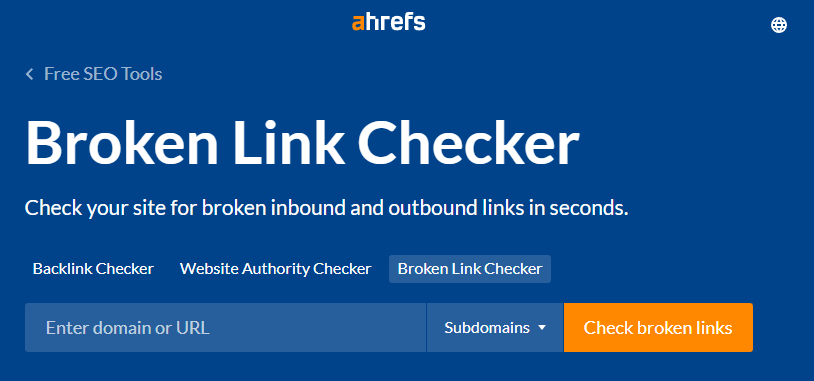
A variety of websites offer free tools for locating broken links. All you have to do with tools like Broken Link Check, Ahrefs Broken Link Checker, and Dead Link Checker is enter your website URL and wait for the website to scan the site for you.

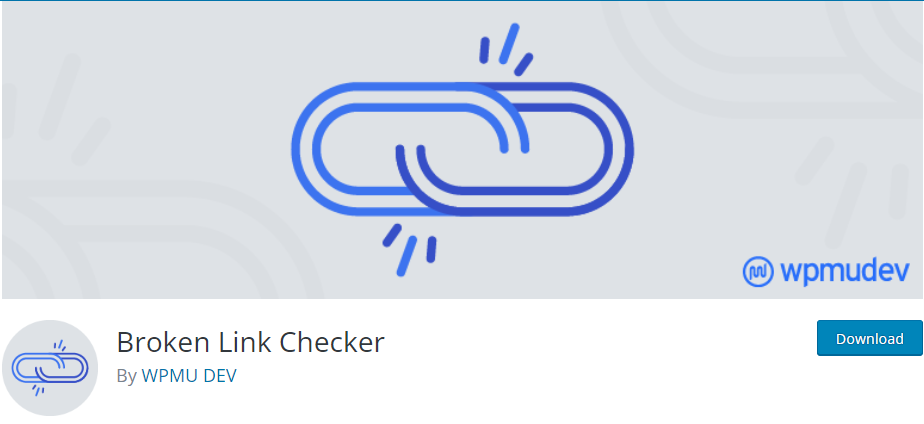
You're in luck if your website was built with WordPress! WordPress has a plugin specifically designed for this purpose. The free Broken Link Checker plugin will monitor your website's links, compile a list of those that don't work, and make it simple for you to edit or unlink each one.
One disadvantage of using a plugin such as Broken Link Checker is that it can temporarily slow down your site while it is active, so keep that in mind when deciding what to use.
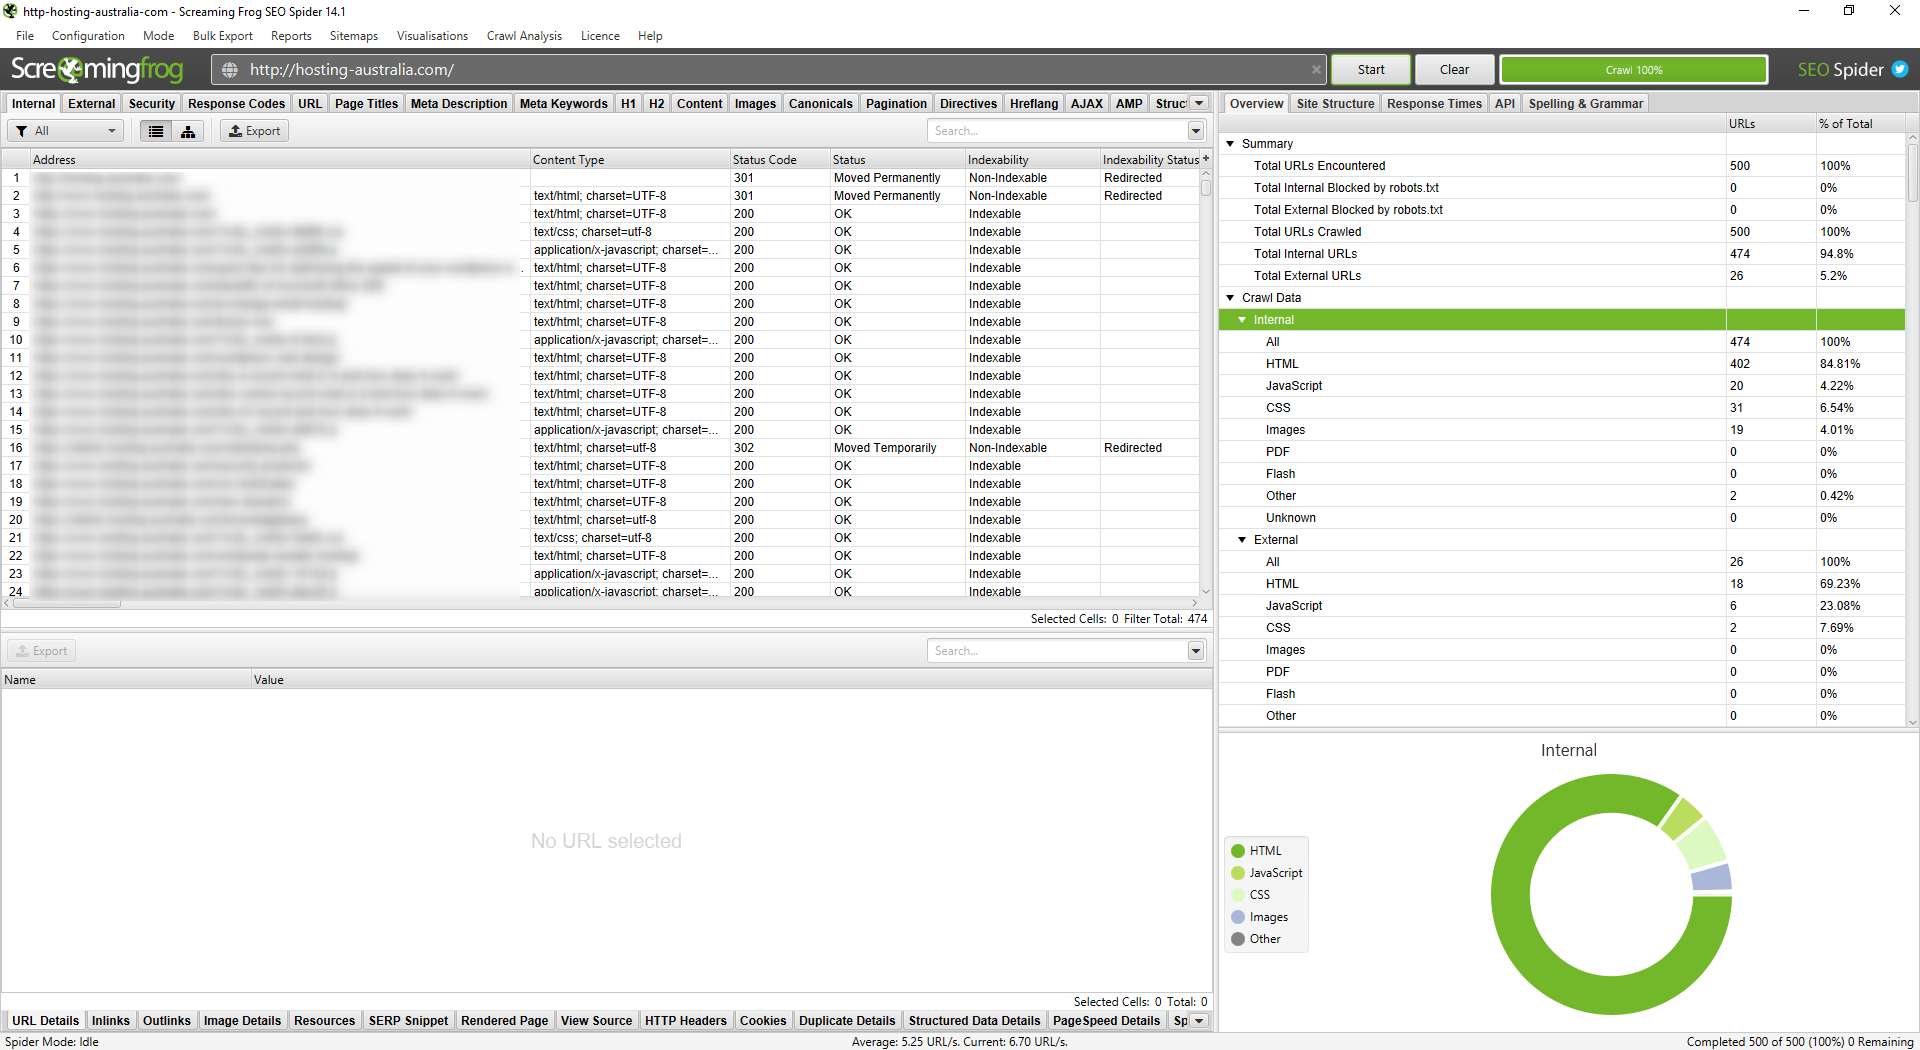
Screaming Frog's SEO Spider tool will crawl your website and automatically identify a variety of issues, including broken links. It is also free to use for websites with fewer than 500 pages. To use SEO Spider to find broken links, you must first download the tool. Once you've downloaded it, simply enter your URL and press the Start button. Crawling your entire website may take a few minutes.
Broken links can be viewed by selecting Client Error from the Response Codes menu. Locate the link on your website by clicking on it and then selecting Inlinks. Choose Bulk Export, Response Codes, Client Errors to get a list of all your broken links in spreadsheet form (which can help you tackle the project of fixing them). Inlinks.
Once you've compiled a list of broken links, the difficult part begins. You must go in and repair each one. Determine which links require an update and which should be removed entirely. Track your progress as you go to avoid missing any, and open each web page to double-check the updated link before moving on to the next.
This takes time, but it ensures that your website visitors have a better experience. It's best to do this once every three months or so to fix any new broken links as soon as possible. And the more you do it, the less work you'll have to do each time. If you're lucky, you'll notice the broken links before anyone else.
Even if you check for broken links on a regular basis, there will be times when you miss one or when users enter a URL incorrectly. Whatever you do, some of your visitors will almost certainly end up on your 404 page. So, take advantage of it when they do.
To avoid confusion, you want people to know they're still on your website when they land on a 404 page. Many brands continue to use generic 404 pages with no branding and no visual connection to the rest of the website.
If you're convinced that it's time to create a custom 404 page for your website but aren't sure how the technical side of updating your 404-page works, you shouldn't have too much trouble figuring it out.
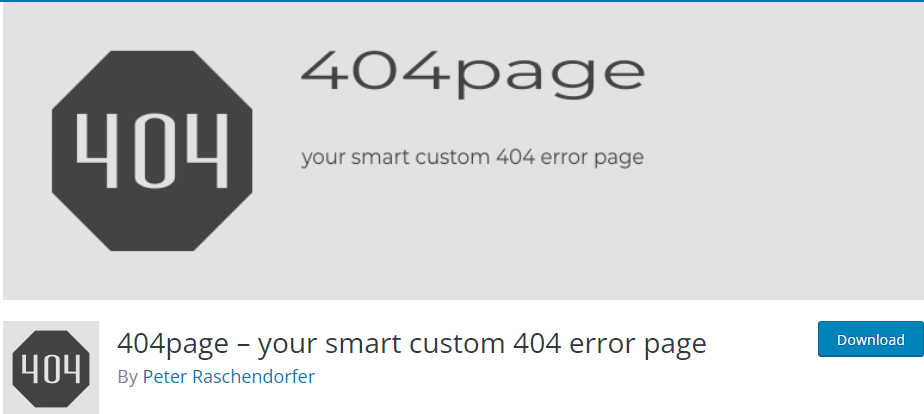
If you use WordPress, you can either follow these instructions or try a plugin like this one.
Otherwise, you can create a custom 404 page via your cPanel with these step-by-step guides.
Businesses put in a lot of effort to get people to visit their websites; the last thing you want is for that effort to be wasted because a customer bounces after landing on a generic 404 page, so make sure your site is free of broken links.
Speed is a major factor in the success of any website. With so many visitors browsing the same content and competing for the attention of those visitors, speed becomes a major factor in whether or not a website is going to be successful. In today’s internet fast-paced environment, not only do you have to keep your visitors engaged but you also have to ensure that your website is fast enough so that it doesn’t become a detriment to your visitors. Optimizing your WordPress website for speed won’t just make your site load faster, it’ll also help you to identify and fix any bottlenecks that could prevent your site from being fully optimized. in this article, you’ll learn quick tips on how to optimize your WordPress website for speed.
A website's failure to function properly can be caused by a variety of factors. You may not have put in a lot of time and effort to create a website that performs well. Alternatively, your website's servers are insufficiently powerful to manage your website. Another possible cause is a high volume of traffic on your website.
Perhaps your website is receiving too much traffic for the promotion you've just put on. When this happens, they may receive a 'try again later error, similar to what they see on Instagram from time to time. Last but not least, your website may contain inefficient code, resulting in a long loading time.
Knowing that slow loading times can significantly reduce conversion rates, you should learn how to optimise your WordPress website for speed. Here are some quick tips for doing so after you've built your website:
One of the most important decisions you will make is selecting the right hosting plan for your website. The only reason your website can exist is because of its host.
As a result, the speed of your website is heavily influenced by the hosting plan you choose. The resources allocated to your plan and the ability to send data from your website to your website visitors will be determined by the hosting plan you select.
Although businesses are constantly looking for ways to save money, it is critical that quality not be sacrificed in order to save a few dollars.
Update notifications can be stressful at times, but you must take them seriously. WordPress plugins, themes, and software must all be updated on a regular basis. Delays in updates should be avoided as they can contribute to a slower website.
Installing the most recent updates also helps protect your website from data breaches and other threats, as new versions are much stronger and safer than previous versions.
Caching assists your WordPress website in reducing the number of requests it handles. To best explain caching, imagine it as a memory for your website that remembers data for a short period of time.
Caching works as follows: when a user first visits your website, a copy of all of their requests is saved as cached files. As a result, the data will be displayed to the visitor the next time they visit your website.
As a result, caching reduces the number of resources required to run your website. As a result, caching can significantly speed up your website.
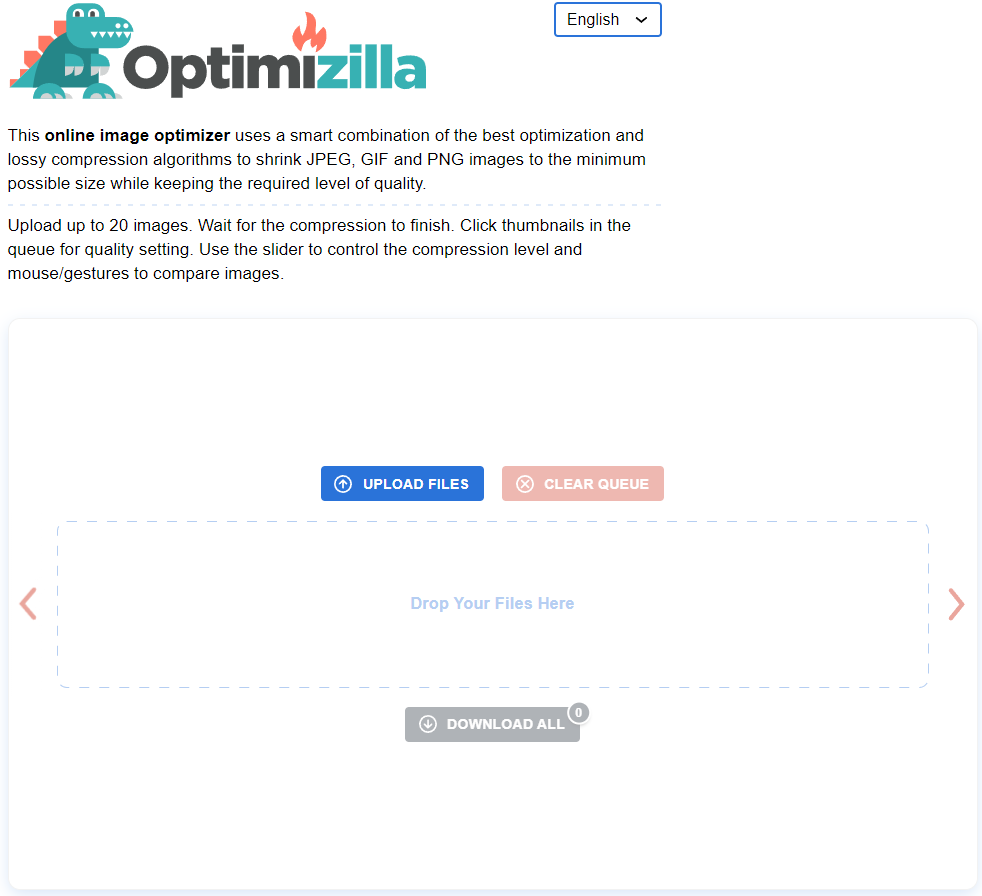
Image optimisation is critical for your WordPress website because it reduces the size of your media files. By optimising your images, you can significantly reduce the amount of server space and bandwidth they consume. Because images are required to keep your website from becoming boring and uninteresting, you should think about image optimisation to make the images smaller.
To improve user experience, you should increase the speed of your website by compressing image sizes without sacrificing image quality. Optimizilla is a great tool for doing so.
Minification is a technique for increasing the efficiency of the code on your website. To put it another way, it compresses and removes unnecessary material from your codes, allowing them to run faster. The code becomes easier to read as the number of characters in each code decreases, increasing the speed of your website.
To Minification your HTML, JavaScript, and CSS codes on WordPress websites, you must use plugins such as Autoptimize and WP Super Minify.
A content delivery network is required to deliver large files on your website. When it comes to sending information online, physical distance plays a role. As a result, regardless of geo barriers, you must use a content delivery network to create a faster speed and a better user experience.
Remove any plugins or themes that you don't normally use. They may require updates, and if you do not update them, your website may take longer to load. Furthermore, the more developed your WordPress website becomes the more files, images, and documents it contains.
Many of these files are no longer in use, so they continue to take up space and slow down your website, even if you have optimised your images. Furthermore, post revisions (the previous versions of your WordPress posts) can take up space, so it's a good idea to clean those up.
At Hosting Australia, we understand that everyone has a fast-paced lifestyle and its hard to keep on top of everything. If your WordPress website takes a long time to load, your website visitors will become frustrated and may leave. This is unfortunate, regardless of how valuable your content is. As a result, it is critical to address any potential issues that may slow down your website. The quick tips listed above can assist you in doing so quickly and easily.
The threat of a hacked website isn't just on the internet – when a hacker breaches your network, he can use your credentials to hijack your personal aspects of your life. The threat is real:
Unfortunately, a hacked website is not the exception to the rule. In fact, data breaches are becoming more and more common, and a surprising number of individuals lose control of their personal data - even when they use the most secure methods, such as two-factor authentication.
But even if you think you’ve secured your site, you should still be wary of hacking attempts. In fact, just this past week, companies like Twitch and Twitter suffered large-scale data breaches.

Accessing your website can be achieved via social engineering(Phishing Email) – this involves tricking a web user into giving up their username and password (or, in some cases, device ID and/or IP address).
A variety of hack tools can be used to steal data from a computer without the user’s knowledge. Your website can also be broken into by hacking your visitors – the malware found on your computer can be used to gain access to your website.
Loss of personal information - in the form of credit card numbers, bank account details, or other identifying information - is the most frequent reason why hacking targets are breached. With the help of these tools, hackers can carry out impersonation attacks on your site.
(SSL) is shorthand for Secure Sockets Layer. It's a method of encryption that establishes a secure connection between your website and your customer's browser. It's not necessary to wait for an attack to obtain an SSL certificate; in fact, it's recommended to do so right away. Once installed padlock displays in the browser bar, indicating that your site is secure to the rest of the world.
The URL of any SSL-protected website will begin with HTTPS rather than HTTP. This is just another indicator to customers that your company takes data security seriously. The lock and HTTPS prefix indicate that data flowing between your company's website and the browser of your customers is encrypted.
If an update for your website, apps, or mobile devices is available, we recommend installing it right away. Yes, we're all busy, but acting quickly reduces the risk of you being a victim of a security flaw that the update is supposed to address. Quick action can literally save your life in the event of a cyber assault.
It can be tempting to use the same password for everything, but this is a recipe for disaster. This entails creating a password that includes numbers, symbols, and both upper and lowercase characters. Encourage your clients to change their passwords and settings on a regular basis if you have a customer portal on your website that requires login.
There's no need to try to remember these; password managers like DashLane or RoboForm Password Safe make it simple to use and update complex passwords on a regular basis.
The majority of hacking attempts occur as a result of website owners failing to update their software. This is frequently the case with WordPress websites, as hackers are attracted to old plugins and themes. It makes no difference if you have a small blog or a large website. If your software is old, dangerous bots can simply explore your website and hack it at some time.
Unfortunately, many small website owners are still ignorant of this flaw and fail to upgrade or backup their CMS until their site is hacked.
Malware frequently travels from one connected device to another, which is why anti-virus software should be installed on your website. Among the most often used programs are:
If you do not have any of these programs installed. We recommend these apps should be installed on all of your devices, including your smartphone and tablet. They'll protect your gadgets from online threats and notify you if hackers are prowling around.
Two-factor authentication is essentially an extra layer of protection. When you enter your login and password on a website, you'll receive a confirmation code via text message or email. This aids in the verification of your identification.
Change passwords on all of your devices straight away.
Then run one of the antivirus programs install on your device that we have recommended.
Contact HA support, so we can run our state-of-the-art malware scanner across all your website files to detect where there is a website breach.
**Fees will apply If you require HA support to assist in the removal of the malicious files after the malware scan**
Because of its customizability and flexibility, WordPress is the most popular content management system. While it isn't flawless, it is generally simple to use.
Although WordPress issues can be daunting, most of them are simple to repair. You may perform basic troubleshooting on your own if you know the error and what caused it.
This post will teach you how to diagnose and fix three of the most common WordPress problems
Before making any major changes to your website, create a backup of your files so you have a copy in case anything goes wrong.
If you are unsure how to create a backup, please view our helpful guide in creating a backup via cPanel.
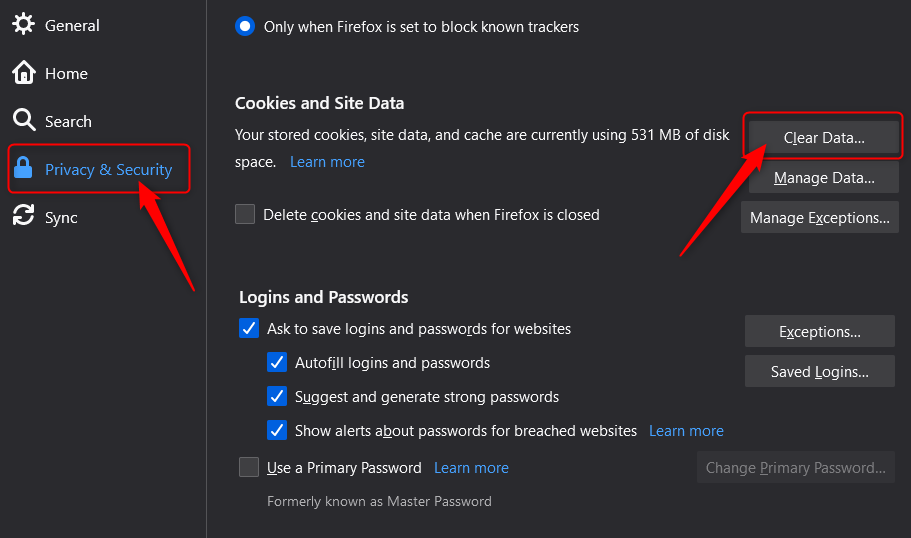
After troubleshooting, always make sure you clear your browser cache. This helps the changes you made reflect instantly on your website, as it is not reading old, saved data from previous views.
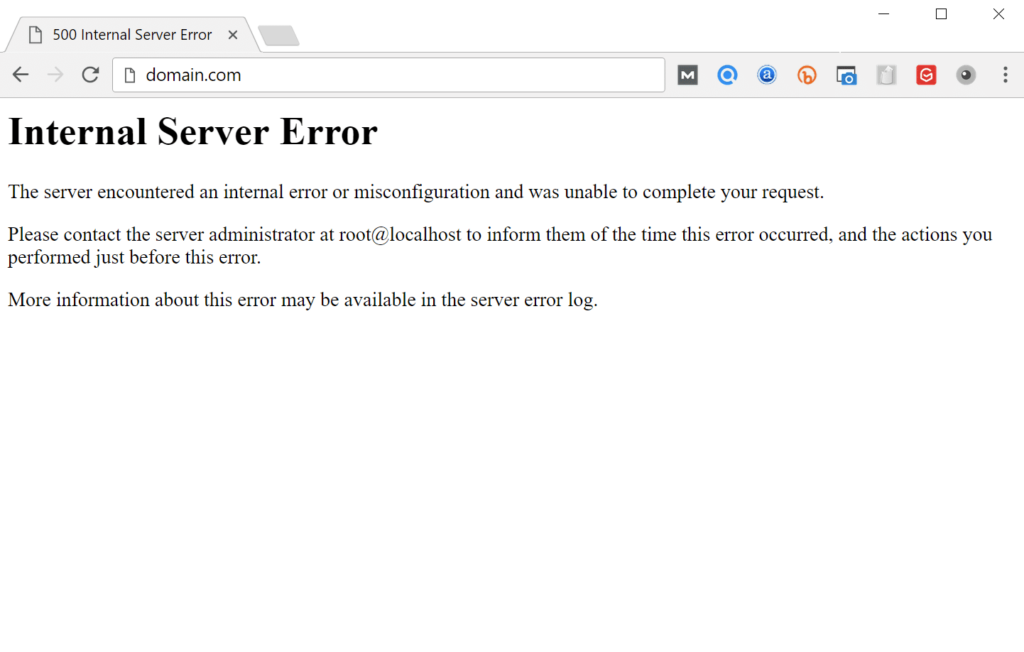
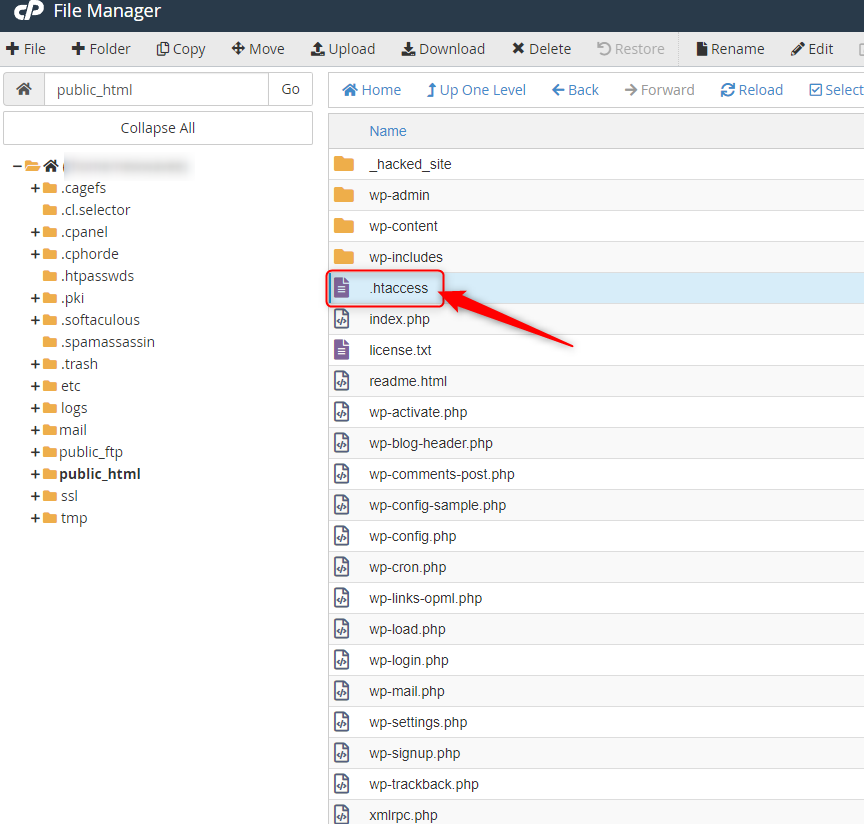
Internal server errors are frequently caused by a corrupted .htaccess file, but they can also be caused by theme or plugin issues.
If you do get the internal server issue, try to use the file transfer protocol to get to the website root (FTP) or you can also access the website files via cPanel’s file manager.
Change the name of the .htaccess file (such as .htaccess-old). To see if reloading the website cures the problem, try it. If the problem has been resolved, go to Settings > Permalinks and create a new .htaccess file to reset your permalinks.
# BEGIN WordPress
<IfModule mod_rewrite.c>
RewriteEngine On
RewriteBase /
RewriteRule ^index.php$ - [L]
RewriteCond %{REQUEST_FILENAME} !-f
RewriteCond %{REQUEST_FILENAME} !-d
RewriteRule . /index.php [L]
</IfModule>
# END WordPres
If you've tried the first method and still get an error, it's possible that the issue is due to incompatible or outdated themes and plugins.
To fix your plugins, deactivate them via FTP or via the cPanel file manager. Then, reactivate them one by one until you find the error. Once you find the errant plugin, report it to the developer. You may also try reverting to the previous theme used when the website was still working.
Deactivate your plugins via FTP or the cPanel file manager to fix them. Then, one by one, reactivate them until you identify the issue. If you need assistance with reinstall your plugins, please contact Hosting Australia support. You might also try reverting to the old theme that was in use when the website was still up and running.
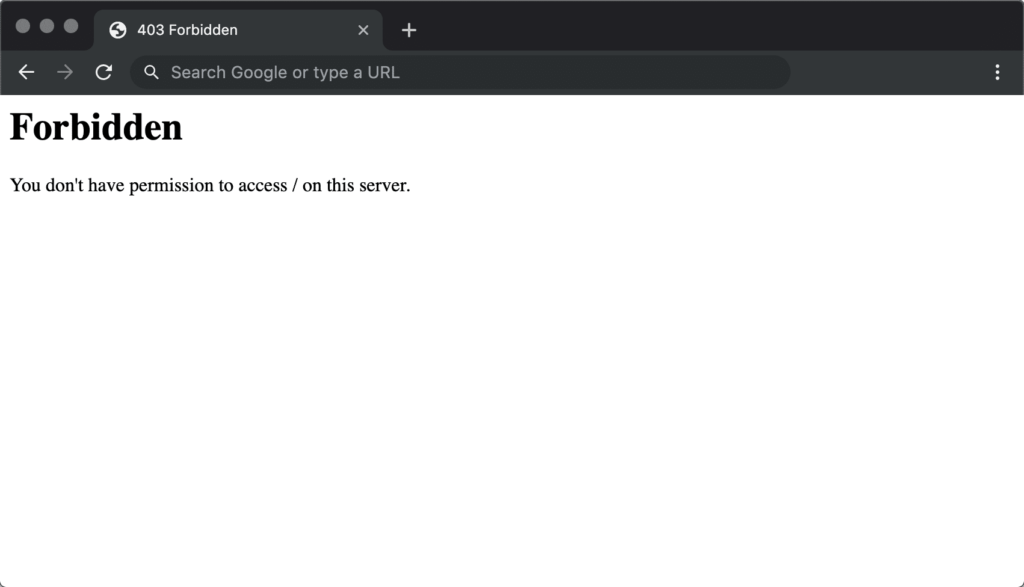
405 forbidden error may be caused by the following:
You may try these fixes for the 34 forbidden errors:
White Screen of Death (WSoD) error may be caused by the following:
You may try these fixes for the WSoD issue:
Try switching the admin side themes, renaming your directory, or modifying the "theme" and "stylesheet" entries in wp options if you get this problem message.
Although WordPress is typically stable, mistakes do occur from time to time. These challenges may appear daunting, but with the help of this guide, you'll be able to get your website up and operating in no time.
The majority of WordPress issues may be avoided by updating plugins and themes, double-checking your .htaccess files, and keeping your website secure.
If you are still having issues after attempting these troubleshooting issues. You can always contact Hosting Australia support via (07) 4914 2433 or alternatively via ticket support@hosting-australia.com.

A website safety check is simple but effective to prevent future problems. There are multiple ways hackers and other malicious entities could infiltrate your network and website. Once they have access, they will be able to steal your data, use the website for nefarious purposes, they will destroy a business from the inside out. Therefore, it is so important to have a regular website safety check.
So, it’s best not to dwell on the idea of whether you should have a regular safety check that could only take a few hours. But save days, weeks, or even years of work.
So, this is a checklist that you can follow to make sure your website is safe.
You may have noticed that some websites have HTTPS:// before www. This is extremely important as the S in HTTPS stands for the Secure Socket Layer. Which encrypts traffic between the user’s browser and your website. This becomes so important; Google is now factoring the existence of an SSL into its SEO formula. This not only improves security but all the searchability of the website.
It is important to have your software and plugins up to date. You can easily update your plugins through the WordPress admin area. While you are updating your plugins, it's also important to remove plugins that are no longer required. Hackers can buy an out-of-date plugin, update it, and add their own malicious code. Then when the plugin is updated, you have the newer compromised version of the plugin. The hacker then uses this plugin as a backdoor into your site, risking all your and the user’s data.
As mentioned before “It’s not a matter of if your website gets hacked, it’s when it will be”. I have seen firsthand entire websites that have been devastated by malicious attacks. Losing all their content and not having a backup to fall back on. Luckily, 2025.hosting-australia.com/ is backing up your cPanel and provides an off-server backup service. However, it is important to have your own personal backup. It doesn’t hurt to have two separate backups in case one of them fails. You can easily backup your cPanel, check your HA knowledgebase article for more information.
Pay attention to extra files you post on your website and include them in your website safety check. Any file that is uploaded such as, images, excel, Word, and PDFs may be corrupted.
Use complex passwords, with various letters, numbers, and special characters. WordPress also has an arrangement of plugins such as Limit Login Attempts Reloaded that are made to stop brute-force attacks and ban IP addresses.
A lot of people create a WordPress admin. But leave the username as “admin”. This is the first username hackers will use when they attempt to brute force into your website. Therefore, it is important to change your username to something less common.
You can use WHOIS to check to keep track of your registrar details for your domain. Hackers can reverse engineer email addresses then use the forgotten password feature on the domain registrar to take control of a domain. They then hold your domain at ransom and will not be released until the demands have been met.
Phishing, even though its spelled differently they are still trying to have the same effect. A fisherman will cast out their line not to target anything specifically, but just to hopefully get an unsuspecting victim. It might sound a bit bleak, but this is exactly what these hackers are attempting to do. They create emails using popular websites and services then legitimize these emails as much as possible for the unsuspecting eye. Hoping that they can get someone to click on a link that gives them access to private information.

Scammers use emails to trick you into giving them your personal information. They use these emails to try to steal your passwords, account numbers, if its any kind of sensitive information, they will try to take it. Unsuspecting victims can lose everything just by clicking on what they think is a legitimate and harmless link. Scammers launch thousands of phishing attacks like these every day. Just like a regular fisherman after casting out so multiple times, they will end up catching something no matter how big or small. Australians lost over $634 million to scams in 2019, according to the latest figures in the ACCC’s Targeting Scams report released 22/06/2020
No legitimate organization will send emails from an address that ends with - @gmail.com @yahoo.com @hotmail.com. even the actual companies that created these email addresses will not send from these emails. Therefore, it is important for a user to have their own business email to legitimize their own business. You can learn more about it in our previous blog article HERE.
For example, your inbox displays a name, like “cPanel Administration”, in the subject line. When you open the email, you already know who the message is from and jump straight into the content. When the scammers create the phishing email addresses, they often have the choice to select the display name, which does not have to relate to the email address at all.
This is just one small step they can take to create emails that look like they are from legitimate sources. Apart from creating fake email addresses they also mimic other emails sent from companies by doing the following:
Another tip you can use to workout if you have received a phishing email. Simply mouse over the link found in the email, a pop up will appear with the linking address. Usually these links will take you to a random link such as “cslsdfbpaymentlsjd.com/askdfmcs” which is a dead give away that it is not from a legitimate source.
First of all you should cancel any cards or accounts with the information you had supplied via the email. Report scams to the ACCC via the Scamwatch report a scam page. Your report helps to warn people about current scams, monitor trends and disrupts scams where possible.
You are also able to contact IDCare on 1800 595 160 or via www.idcare.org for support if you believe your personal information has been put at risk.
Notify 2025.hosting-australia.com/, as soon as we are notified the support staff will take measures to secure your account with us.
Archiving has become an important tool, with the businesses moving towards a more electronic and digital world, you will have noticed more emails are being sent out regularly. These emails include junk and important email documents. It becomes overwhelming trying to organize, what to keep and what to delete. Like a physical mailbox, you can only fit a certain amount inside the mailbox until it the mail is sent back to the original sender (Bounce Backs)
It will reach a boiling point, where you are unsure which emails to keep and which emails to delete. This can become a problem just like a physical mailbox – once it reaches its allocated capacity you will no longer be able to receive any more emails, the email will then be sent back to the original recipient. The recipient will receive the bounce-back message we all know and love.
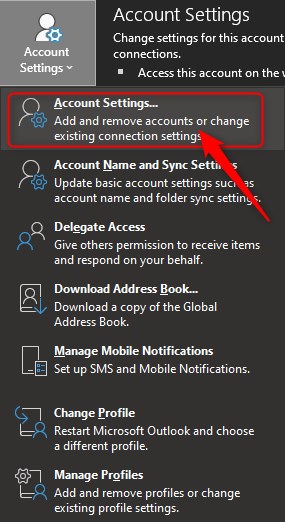
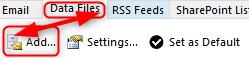
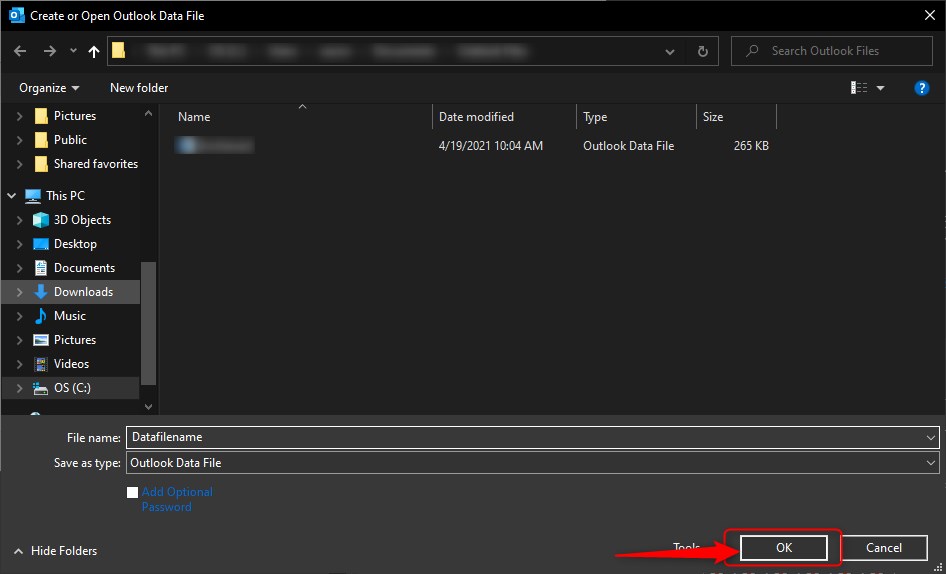
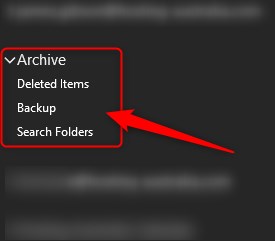
Before you find that your mailbox reaches capacity, you can simply archive messages by copying them to an offline location on your computer to prevent this issue in the future. This sounds like it could be a bit tricky, but it is quite easy and only takes a few minutes to set it up. This will free up lots of space within your mailbox without permanently deleting those old emails and can even speed up your email systems synchronization with the email server.

You may have come across an issue with your WordPress site. Maybe it is not performing at the level it was once before. You may have done some research into the best troubleshooting steps, and one of the top troubleshooting methods is to clear the cache on your WordPress site.
But what is cache? You may have heard or seen the word before, but you are not familiar with what caching is or how clear the cache on your WordPress site works. Here at 2025.hosting-australia.com/ we are determined that your site is running at peak performance. So, here is the rundown on how and why to clear your WordPress cache.
You may have come across a site; it may have taken a too long to load or had been inconsistent. Therefore, site speed plays a huge role in a website’s performance. These slow speeds also affect search engine optimization (SEO).
Each time a user visits your website, the server must load all the various files that make up the web page they have visited. This also includes CSS, image files, text, videos, even WooCommerce. The more you have on your page, the longer it will take to load.
If you have WordPress caching set up, after loading your web page once, your server will remember what it looked like the next time someone visits. Instead of having to load each file all over again separately, it can more quickly load the webpage.
There is caching on multiple levels, now let us take a look at the different levels of caching.
Sever cache is a type of cache that is related to site caching, except instead of temporarily saving content on the client side, it is stored on a site’s server. Sever caching is also fully handled and administered on the server without any involvement of the end user, or browser.
A browser cache is a kind of client-side cache, which means it is also a type of site caching. It works in the same way and it is a cache system that is built into a browser.
Files and content that are saved are stored on your computer are grouped with other files associated with the browser you use.
A browser cache temporarily saves content such as:
There is not one WordPress cache to clear. Based on the apps and plugin you use, clearing your cache can mean several different things.
with the browser you use.
A browser cache temporarily saves content such as:
How to Clear your Cache.
There is not one WordPress cache to clear. Based on the apps and plugin you use, clearing your cache can mean several different things.


Any WordPress caching plugins you use should provide an easy way to clear your cache. Its as simple as install the plugin and the plugin will do the rest.
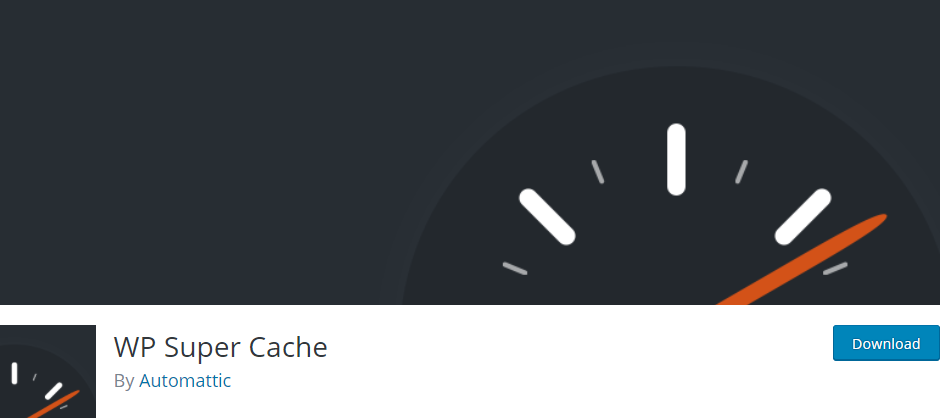
WP Super cache generates static html files from your dynamic WordPress blog. After a html file is generated, your webserver will serve that file instead of processing the comparatively heavier and more expensive WordPress PHP scripts.
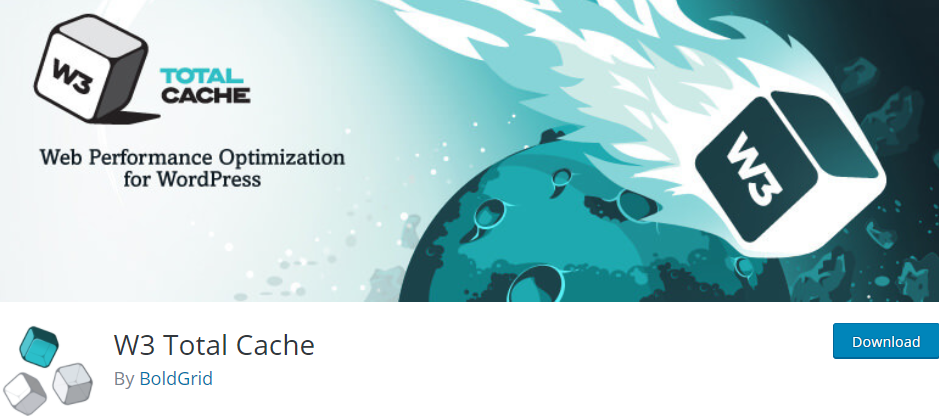
W3 Total Cache improves the SEO and user experience of your site by increasing website performance and reducing load times by leveraging features like content delivery network CDN integration and the latest best practices.
Making sure your Website is performance is the best it can be!
Knowing how to clear the various caches in the different services and applications is a useful tip for any time you need to do some troubleshooting with your website. That is why Enabling caching on an ongoing basis in these different applications and places is a good way to keep the performance of your WordPress website up to the standards your users expect and deserve.
WordPress shortcodes are an incredibly useful way to customize your site and add new features. Without having to learn any code and code yourself. If you have installed any plugins or made any adjustment to your WordPress site, you have probably come across the term “shortcode”.
To put it simply, a shortcode is a small piece of code, indicated by brackets like [this], that performs a dedicated function on your site. This shortcode can placed about anywhere you would like, and it will add a specific feature to your page, post, or other content. For example, a shortcode can be used to display galleries, payment portals, or videos.
If you are still not completely sure what shortcodes are and how and why they are used within WordPress, Let's take a deep dive into more of the basics, show some examples, and plugins that you can use to expand your shortcode.
Most existing themes and plugins are equipped with their own shortcodes that allow you to tap into additional features or display certain plugins across your site.
Therefore, WordPress is such a power web designing tool. Since it is an open-source platform, it allows you to customize it in any way you would like. But as mentioned previously if you are not a developer and have no coding experience, adding code yourself is not really feasible. Therefore, shortcodes have been developed so you can achieve the same effect, without needing to know any coding.
Shortcodes can be used on any location in your WordPress post or page. That includes widget-ready areas like sidebars, headers, and footers, as well as in the main content.
So, now you have the basics down of what shortcodes are, how do you add them to your WordPress? But first let us see what shortcodes are incorporated into the WordPress:
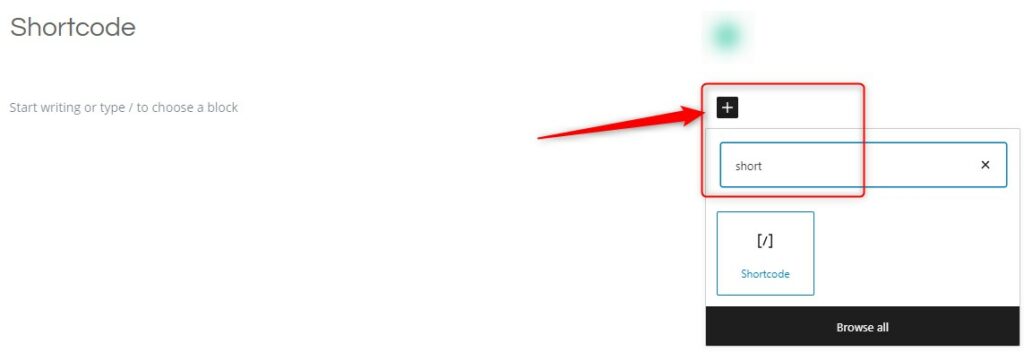
To implement any of the above, you will need to go to the Default Editor within WordPress to add shortcodes:
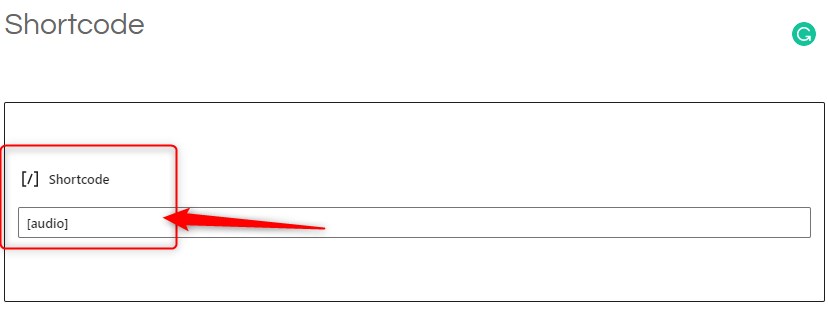
Sometimes you may wish to use the text which usually represents a shortcode in your posts. To do this, you need to escape the shortcode by using two sets of brackets instead of just one. So to display this in your post:
[audio]You would write this:
[[audio]]For shortcodes that have a start and end tag, you only need to scape the very first and very last brackets:
[[audio]] . . . [/audio]]If you are looking to add more shortcode functionality to you site, then using a WordPress shortcode plugin will be your best bet.
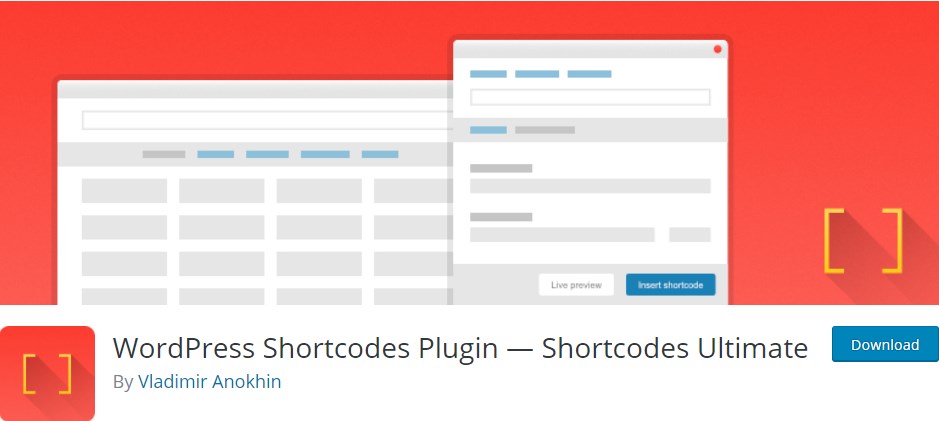
Shortcodes Ultimate is a free plugin for users who want a lot of options and each one easily available with the following features:
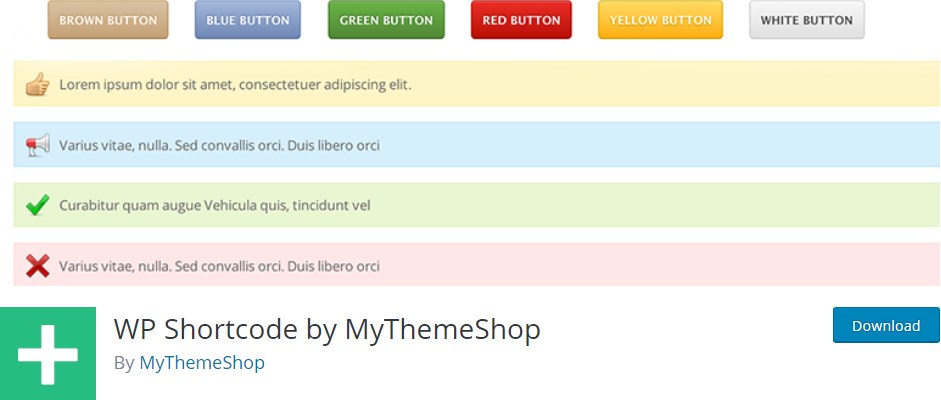
WP Shortcode by Mythemeshop is a lightweight and easy to use shortcode plugin. This plugin will allow you to add functions like:
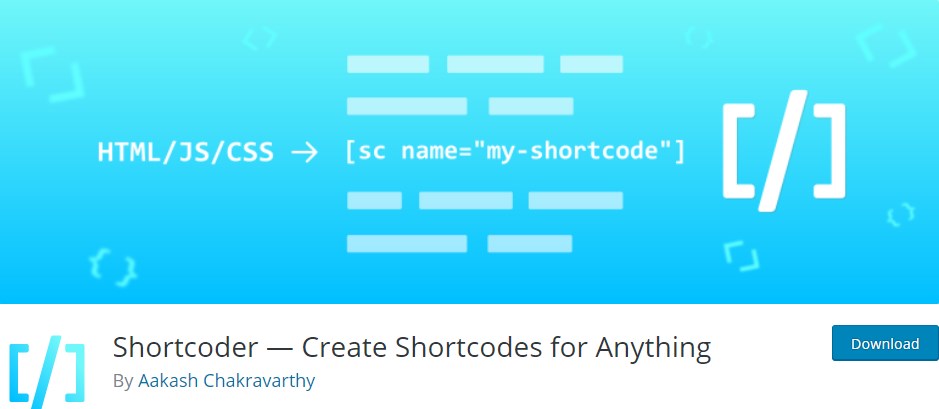
Shortcoder lets WordPress you generate custom shortcodes that contain HTML, CSS and JavaScript. Paste in your code, assign and recognizable name to your new shortcode, then place it anywhere on a page or post. Shortcoder also includes the following features:
Shortcodes are one of the most effective ways to customize your site without know how to code. Without the ability to shortcode you would have to take the time out of your day learning how to code as the original theme would be a nightmare to customize without them.
Here at 2025.hosting-australia.com/ we understand that your time is important. But, taking time to understand how effective features like shortcodes are to help grow your business.
If you have any issues or queries, about shortcodes please contact 2025.hosting-australia.com/ support here!
Adding JavaScript is the perfect option if you wish to add an array of extra elements to your WordPress website. you can do this without Javascript by installing multiple plugins, but doing this will cause the headache and issues of having to manage them all and also the risk of slowing down your website.
The interesting thing about JavaScript is that it is a coding language that instead of running on your server, within the file manager on your cPanel, it runs on the user’s browser. This allows you to adjust your website without the fear of your website loading times being affected.
WordPress will allow you to add JavaScript it, but it can just be a bit touch-and-go as WordPress does not allow you to add JavaScript code snippet directly into your page. If you attempt to add the code onto the page, there is a good chance WordPress will delete it when you have saved your edits. This will cause confusion and frustration when your site no longer works.
We will be covering in this article the easiest and most effective way you can add JavaScript to your website. But first, we need to cover what a script is.
So, you can understand JavaScript even more than just adding it, it is important to cover what a script even is. A script is a pre-made code language that developers and designers use to perform specific actions.
There are multiple different coding languages for writing scripts all with their own syntax’s, these are the most commonly used languages:
Adding a script using the JavaScript language your website will allow you to add various things to your website, for example:
So, how do you add JavaScript onto your page? There are two easy methods, let's go over them now.
To use this method for adding JavaScript code to your whole website, the best option is to download the Insert Headers and Footers plugin.
You can edit and add JavaScript code to your WordPress theme’s header.php or footer.php files within your file manager via cPanel. However, you must also keep in mind that if you do edit your theme files, every time you update your theme, WordPress will override the code deleting your edits.
Using Insert Headers and Footers plugin is an easy workaround for this problem. Even if you update your theme, your headers and footers code will stay put if you use the plugin.
Once you have added the changes to your header or footer, you will see your changes site-wide, even if you update your WordPress theme, this plugin will save your JavaScript code information, keeping your JavaScript changes active.
If you do not just want your JavaScript to be displayed on your headers and footers, but instead add it to a post or page. You will want to install the Code Embed plugin.
Below you will find the steps for adding JavaScript using Code Embed plugin: